
What steps are involved in prepping metal for powder coating to ensure defect-free results?
Preparing metal for powder coating involves inspecting the substrate, removing oil, rust and existing coating, abrasive blasting or other profiling, then drying, masking and checking the surface before application. Each stage removes contamination and creates a clean, suitably keyed surface for consistent powder adhesion and a low-defect finish.
Defect-free powder coating depends on preparation that is matched to the metal, its condition, its design and the coating system. The aim is not simply to make the surface look clean; it is to produce a chemically compatible, suitably textured and contamination-free substrate that will allow the powder film to bond and cure consistently.
1. Confirm the substrate and coating requirements
Steel, galvanised steel, aluminium, stainless steel and cast metals can require different preparation routes. The chosen treatment should account for the alloy, previous service conditions, expected corrosion exposure and the intended powder system. A process suitable for mild steel may be unsuitable for aluminium or zinc-coated components, particularly if aggressive abrasion or unsuitable chemicals could alter the surface.
Component drawings and coating requirements should also identify areas that must remain uncoated, mating faces, threaded holes, electrical contact points and close-tolerance interfaces. These details affect how the part is prepared, supported and masked, and help prevent coating build-up from interfering with assembly.
2. Deal with fabrication details before coating
Weld spatter, sharp burrs, grinding marks, press damage and poorly finished joints can remain visible through the powder film. Welds should be sound and free from porous openings, while corners and cut edges may need suitable finishing to reduce excessive film thinning or uneven coverage. Sharp edges are particularly vulnerable because powder tends to pull away from them during curing, leaving less protection at the point most exposed to damage.
Hollow sections, folded returns and overlapping joints need special attention. Trapped oils, moisture or blasting media can later escape through gaps and create pinholes, bubbling or contamination. Drainage and vent holes should be incorporated where appropriate, especially on enclosed fabrications, and their position should be considered before coating rather than after a defect appears.
3. Control residues after surface treatment
Preparation can introduce its own contaminants. Abrasive dust, salts, detergent residues, conversion-treatment chemicals and handling marks can all affect adhesion or appearance if they remain on the surface. Rinsing and drying therefore need to be controlled for the particular process, with attention to recesses, seams and horizontal surfaces where liquid can collect.
Water-break testing can help identify persistent oily contamination: clean water should spread across the surface rather than retract into isolated droplets. On components exposed to corrosive environments, soluble salts are also important because they can draw moisture beneath the coating and contribute to underfilm corrosion. Where required, testing for surface salts provides more useful evidence than visual inspection alone.
4. Prevent recontamination during handling
A prepared part can be compromised by bare-hand contact, dirty racks, workshop dust, silicone products, oily gloves or contaminated protective materials. Components should be handled with suitable clean gloves and supported in a way that does not transfer residue to the coating surface. Racks, hooks and contact points must also allow reliable suspension and electrical continuity without placing marks in visible areas.
Preparation and coating areas should be separated from activities that generate oil mist, sanding dust, silicone vapour or other airborne contamination. This is especially relevant to decorative finishes, where small particles can become visible as nibs or inclusions.
5. Address outgassing risks
Castings, porous welds, zinc-coated parts and some fabricated sections may release trapped air, moisture or process residues when heated. This can cause pinholes, bubbles or craters in the cured film. Suitable preheating, venting, storage and powder selection may reduce the risk, but the correct approach depends on the material and component design.
Outgassing should be considered during sample preparation rather than treated as an application fault only after production begins. A trial part can reveal whether the substrate releases gas during the heating cycle and whether additional preparation or design changes are needed.
6. Preserve the prepared surface until application
Once the substrate has been treated, avoid unnecessary delay, moisture exposure and contact with contaminants. The acceptable interval depends on the metal, environmental conditions and treatment used. Steel can develop flash rust if moisture is present, while other substrates may oxidise or collect surface contamination without obvious visual change.
Parts should be stored in a clean, dry condition and protected from condensation. If the surface becomes contaminated or its condition changes, it should be reassessed rather than coated solely because it passed an earlier preparation check.
7. Verify preparation with process checks
Visual checks should be supported by appropriate controls, such as surface-profile assessment where abrasive preparation is used, cleanliness checks, salt testing for demanding environments and checks on masking, drainage and contact locations. The exact tests should reflect the substrate, specification and service conditions.
For repeat or batch work, recording the preparation route, treatment chemistry, abrasive condition, component orientation and any recurring defect pattern helps identify process variation. If defects appear consistently in one area, the cause may be a design feature, trapped contamination, inadequate drainage, poor electrical contact or uneven preparation rather than the powder itself.
In practice, the most reliable preparation process combines compatible treatment, sound fabrication, controlled handling and documented checks. Powder coating can conceal minor surface variation but cannot correct oil trapped in a joint, porous casting, sharp unprepared edges or contamination introduced after treatment. Resolving those issues before application gives the coating the best conditions for consistent adhesion, appearance and service performance.
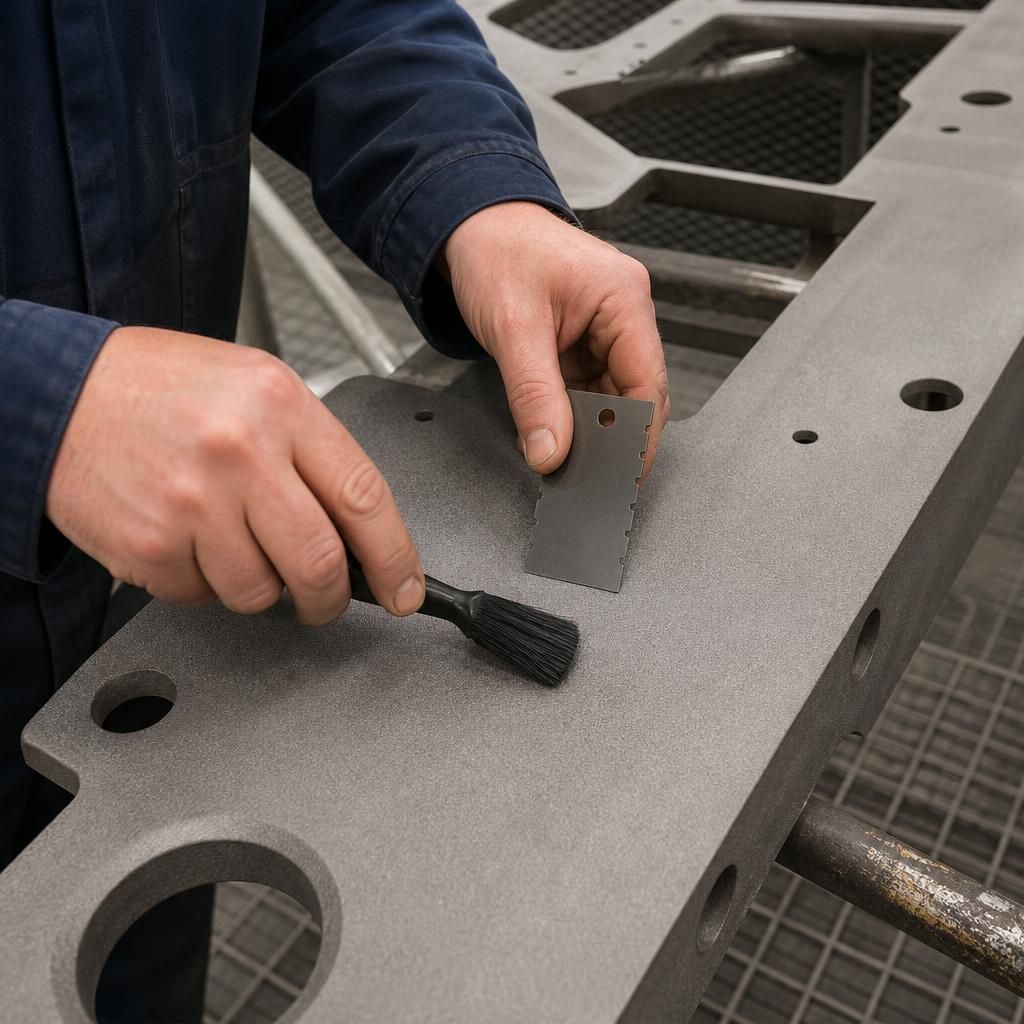
Surface profile must be controlled, not simply created. Abrasive preparation should leave a consistent key for the powder coating without producing excessive roughness. An under-profiled surface may provide insufficient mechanical grip, while an overly aggressive profile can remain visible through the finish, increase powder usage and leave peaks with reduced coverage.
After blasting, representative areas should be checked using a suitable profile comparator or measurement method, with loose abrasive dust removed before coating. If the profile varies across the component, the blasting media, pressure, working distance or exposure time may need adjustment. Checking several areas is particularly important on large or complex parts, where recesses and edges can receive different treatment from broad, accessible faces.