

How can I identify and resolve rust spotting issues in powder coat primer applications?
Rust spotting in powder coat primer appears as isolated orange-brown marks or bleed-through, usually indicating corrosion beneath the coating, inadequate substrate preparation, trapped contamination or insufficient primer protection. Identify the source by examining the affected metal and reviewing preparation and curing records, then remove corrosion, reprepare the surface, correct the primer or curing process and recoat after confirming the underlying cause has been addressed.
Rust spotting is resolved reliably by linking each mark to its location, shape and stage of appearance, then correcting the relevant preparation, material-handling or coating-control step. A sound repair is not simply a matter of covering the visible spot: active corrosion or a process condition must be removed before the area is recoated.
Start with a controlled inspection. Record where the spots occur and whether they are concentrated on edges, welds, recessed areas, drilled holes, joints or broad flat faces. Marks confined to welds may indicate heat scale, weld spatter, acidic residues or insufficient cleaning around the joint. Spotting on edges can point to sharp geometry, low coating coverage or damage incurred during handling. Marks around holes and cavities commonly require closer attention because cleaning, rinsing and drying are more difficult in those areas.
Compare affected components with unaffected items from the same batch. Check whether the defect appeared before dispatch, after storage or only after installation. Examine the coating under suitable lighting and, where practical, use a magnifier to establish whether a spot begins at a chip, pinhole, scratch or exposed edge. If the film is intact above the mark, carefully opening a representative defect can show whether corrosion is beneath the film or whether the colour has migrated from an adjacent area.
Review the incoming metal and fabrication history. Look for mill scale, flash rust, embedded abrasive, weld residue and carbon-steel particles transferred to stainless or galvanised parts. Mixed-metal handling can create contamination even where the finished component appears clean. Recent fabrication work, outdoor storage, condensation and contact with wet packaging should also be recorded. A coating issue may originate before the part enters the preparation line, so retain traceability for the substrate, fabrication stage and preparation route.
On galvanised or zinc-coated steel, distinguish red rust from white corrosion products. White deposits can form when zinc reacts with moisture, while red-brown spotting indicates iron corrosion or exposed steel. The correct treatment depends on the condition of the zinc layer and the specified coating system; aggressive abrasion can remove useful protection, whereas insufficient preparation can leave residues that interfere with the primer.
Check the preparation process in sequence.
- Confirm that oil, grease, salts, marker residues and other soils are removed before abrasive treatment or chemical preparation.
- Check that the selected abrasive is clean and suitable for the substrate, with no carry-over from rusty or incompatible material.
- Inspect the prepared profile and appearance for remaining scale, corrosion in pits, embedded particles or areas that were shielded during blasting.
- Verify that parts are rinsed where the process requires it and that residues are not left in seams, folds, holes or blind recesses.
- Confirm that the component reaches the coating stage clean and dry, rather than being exposed to condensation after preparation.
Pay particular attention to the interval between preparation and priming. A prepared steel surface can begin to oxidise before coating, especially when humidity, temperature changes or poor storage conditions are present. Parts should be protected from moisture and handled with clean equipment. Gloves, racks, hooks and lifting fixtures should not reintroduce oil or rust after the final cleaning step.
Assess the primer film itself. Confirm that the powder is the specified product for the substrate and exposure conditions, and that the applied film is continuous across edges, welds and difficult geometries. Low coverage can leave vulnerable areas, while excessive build, poor flow or trapped gas can conceal preparation defects and create later pathways for moisture. Check powder condition, storage, reclaim controls and application settings where these are part of the process specification.
Curing records should be assessed using the metal temperature reached by the component, not simply the oven air setting or the time that the part spent inside the oven. Differences in section thickness, loading pattern and component position can produce under-cured areas. An under-cured film may have reduced resistance to moisture and chemicals, but increasing oven temperature without evidence can damage the finish or distort the coating system. Use the primer manufacturer’s specified cure schedule and verify the actual part temperature with appropriate recording equipment.
Use testing to separate similar-looking defects. A dry-film thickness check can identify thin areas, while a solvent or cure assessment may indicate whether the film has reached the required cure. Adhesion testing on a representative area can show whether the film is securely attached, although testing should be agreed with the coating specification because it is partly destructive. Salt contamination testing, surface cleanliness checks and inspection of the blast profile can help when corrosion returns despite apparently good visual preparation. Where the cause remains uncertain, retain an affected sample for examination rather than stripping every component without diagnosis.
Repair isolated spotting only after confirming the coating specification permits local repair. Remove the affected coating far enough to expose clean, stable metal around the defect. Eliminate corrosion mechanically or by the approved chemical route, remove dust and residue, and feather the surrounding coating to avoid a hard repair edge. The exposed area must be fully dry before the compatible primer and topcoat are applied at the specified film thickness and cured correctly. If corrosion extends beneath apparently sound coating, a small local patch may leave active material in place; strip and reprocess the component instead.
For repeated or widespread spotting, stop treating parts individually and investigate the process as a batch issue. Quarantine affected work, compare preparation and curing records, inspect the line for contaminated media or rinse problems, and examine racks, storage areas and handling equipment. Recoat only after a trial component or agreed inspection sample demonstrates that the revised preparation and coating route has removed the cause. Document the defect pattern, corrective action and verification result so that the same failure can be traced if it reappears.
Long-term prevention depends on controlling the whole route from fabrication to finished storage: sound weld preparation, suitable cleaning, consistent surface preparation, protection from moisture, adequate coverage at vulnerable geometry, correct curing and careful handling after coating. For industrial batches or complex metalwork, a powder-coating specialist can review the substrate, preparation method and coating specification together rather than assessing the visible rust marks in isolation.
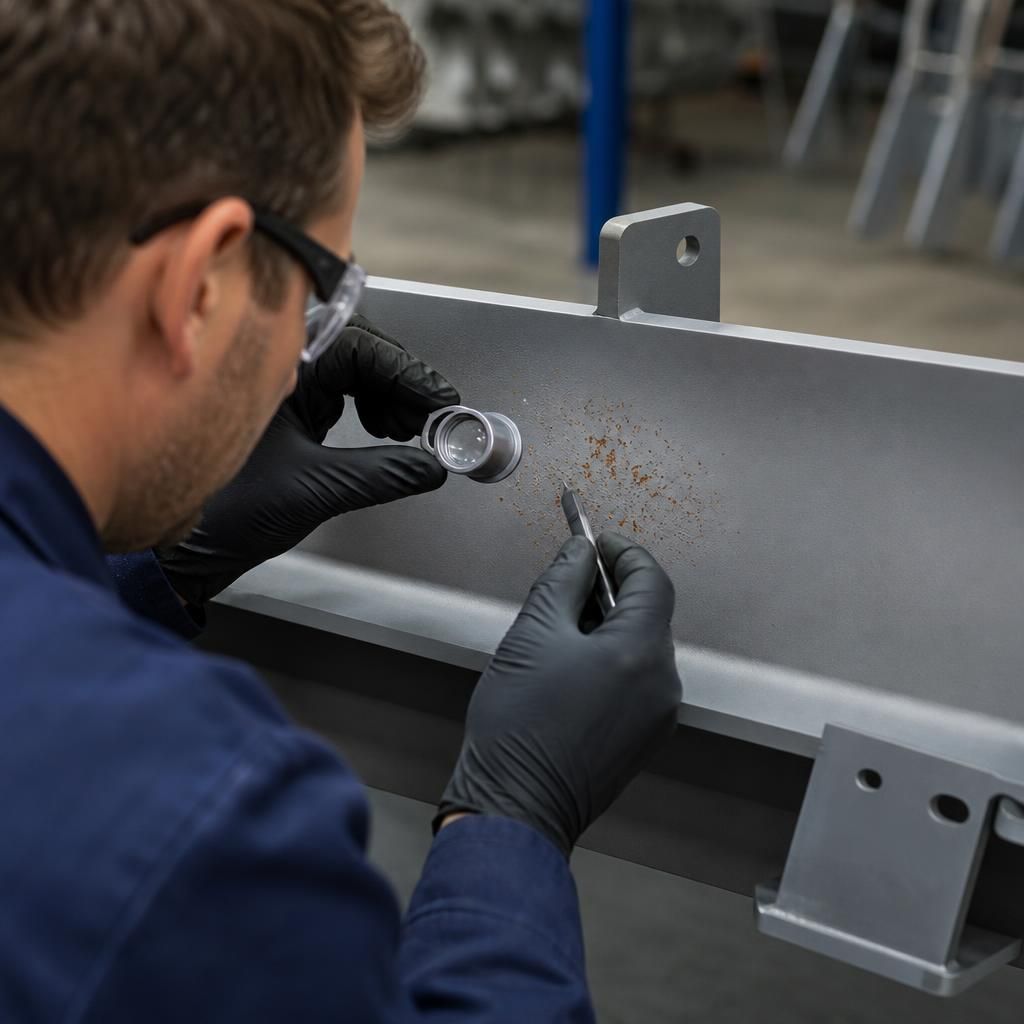
Rust-coloured marks should not be diagnosed by colour alone. A representative spot should be examined through the coating to determine whether the metal beneath is pitted or discoloured, or whether the mark is loose contamination sitting within or on top of the film. A clean, shallow surface mark may require a different correction from corrosion that has penetrated the substrate.
Where examination shows sound metal and removable contamination, clean the area using the approved method and check adjacent coating for related particles or residues. Where the substrate is pitted, weakened or surrounded by under-film corrosion, local cosmetic treatment is unlikely to be adequate; the affected component may need complete stripping and reprocessing. Record the examination result with the defect location so future spotting can be matched to a specific preparation or handling stage.
Discuss persistent rust spotting in powder coat primer
If rust spotting persists after local correction, ask a powder-coating specialist to assess the affected components alongside the preparation and curing records. This can help determine whether reprocessing, a revised coating specification or a more detailed failure investigation is appropriate.