
How should post-degreasing inspections be conducted to ensure surfaces are adequately prepared for powder coating?
Post-degreasing inspections should confirm that the metal is visibly clean, free from residue, fully dry and suitable for powder coating. Check under consistent lighting, inspect edges and recesses, and use an appropriate surface test—such as a water-break check where suitable—to identify remaining oils or contamination before coating begins.
Post-degreasing inspection is a documented quality-control check that confirms the cleaning stage has produced a chemically suitable surface, not merely a metal component that looks clean. The inspection should combine a planned visual and tactile assessment, targeted contamination tests, checks on difficult features and a clear decision to accept, reprocess or quarantine the part before any powder or subsequent treatment is applied.
1. Confirm the inspection conditions and part identity
Inspect the component in a controlled area after the degreasing and rinsing stages are complete. The person carrying out the check should verify the job reference, metal type, component orientation and the specified preparation route. This prevents a clean part from being assessed against the wrong requirements, particularly where a batch contains several materials or geometries.
Inspection should take place after the part has reached a stable condition. Handling must be controlled because fingerprints, grease from gloves, workshop dust and contact with unclean racks can reintroduce contamination after degreasing. Clean gloves or suitable handling equipment should be used, and prepared surfaces should not be placed directly on dirty benches.
2. Assess the whole component, not just the accessible faces
Examine the areas most likely to retain degreaser, rinse water or process contamination. These commonly include:
- Internal corners, folds and returns
- Holes, slots, threads and bores
- Welds, heat-affected areas and weld spatter
- Overlapping joints and concealed contact points
- Edges, underside faces and areas supported by hooks or racks
- Rough, machined or textured regions that can hold contamination
These locations deserve more attention than broad, open faces because liquid can be trapped or cleaning action can be less effective there. On complex fabrications, the inspection plan should identify critical areas in advance rather than relying on a quick check of the most visible surface.
3. Use a clean transfer check where appropriate
A clean, lint-free wipe can be drawn across selected areas to identify transferable contamination. The wipe should be checked for oily marks, dark deposits, powdery residues or unusual discolouration. A clean result does not prove that every contaminant has been removed, but a visible transfer is sufficient reason to reject the part for coating and investigate the cleaning process.
This test must be performed carefully. Reusing a wipe, touching it with bare hands or testing a dirty rack can produce misleading results. For high-value or safety-critical work, use a defined sampling plan and retain the inspection record rather than relying solely on an operator’s judgement.
4. Check for cleaner and rinse residues
Degreasing can remove oil while leaving alkaline cleaner, salts or other process residues if rinsing or drainage is inadequate. Residue may interfere with subsequent pretreatment and can contribute to poor coating adhesion, blistering or surface defects.
Inspect drainage paths, blind holes and horizontal ledges for evidence that liquid has pooled. Where the process specification requires it, rinse quality can be monitored using an approved pH, conductivity or residue test. The relevant acceptance limit should come from the chemical supplier’s instructions, the coating specification or the site’s quality procedure; it should not be guessed from appearance alone.
5. Check that the result is consistent across the batch
Sampling should reflect the risk presented by the job. Inspect the first-off component after the process has been set, then check representative parts throughout the batch and give additional attention to components from different racks, positions or processing loads. Parts with the greatest surface area, most recesses or the most difficult drainage should be included.
If one component fails, do not assume that the rest of the batch is acceptable. Segregate affected parts and establish whether the cause relates to loading, chemical condition, contact time, rinsing, temperature, drainage or handling. A repeat inspection should follow any corrective action.
6. Apply clear acceptance and rejection criteria
An accepted component should meet the documented requirements for the coating system and show no evidence of transferable oil, chemical residue, trapped process liquid or contamination introduced during handling. A failed component should be identified and prevented from moving into coating until the cause has been assessed.
Reprocessing may involve further degreasing, improved rinsing, controlled drying or another approved preparation step. Simply wiping a suspect area or applying powder over it is not a reliable correction. If contamination has penetrated a porous deposit, remained in a joint or resulted from a wider process fault, the entire part or batch may require review.
7. Record the inspection outcome
Quality records should identify the batch or job, inspection date, operator, preparation route, tests used, result and any corrective action. Record failures and reinspection results as well as accepted parts. This creates traceability and helps identify recurring problems, such as contamination concentrated at a particular rack position or residue associated with a rinse stage.
For outsourced powder coating, providing the coater with the material type, fabrication details and any known contamination risks can help ensure that inspection findings are interpreted correctly. Where a part does not meet the agreed preparation requirements, it is better to resolve that issue before coating than to treat coating defects as a powder or curing problem.
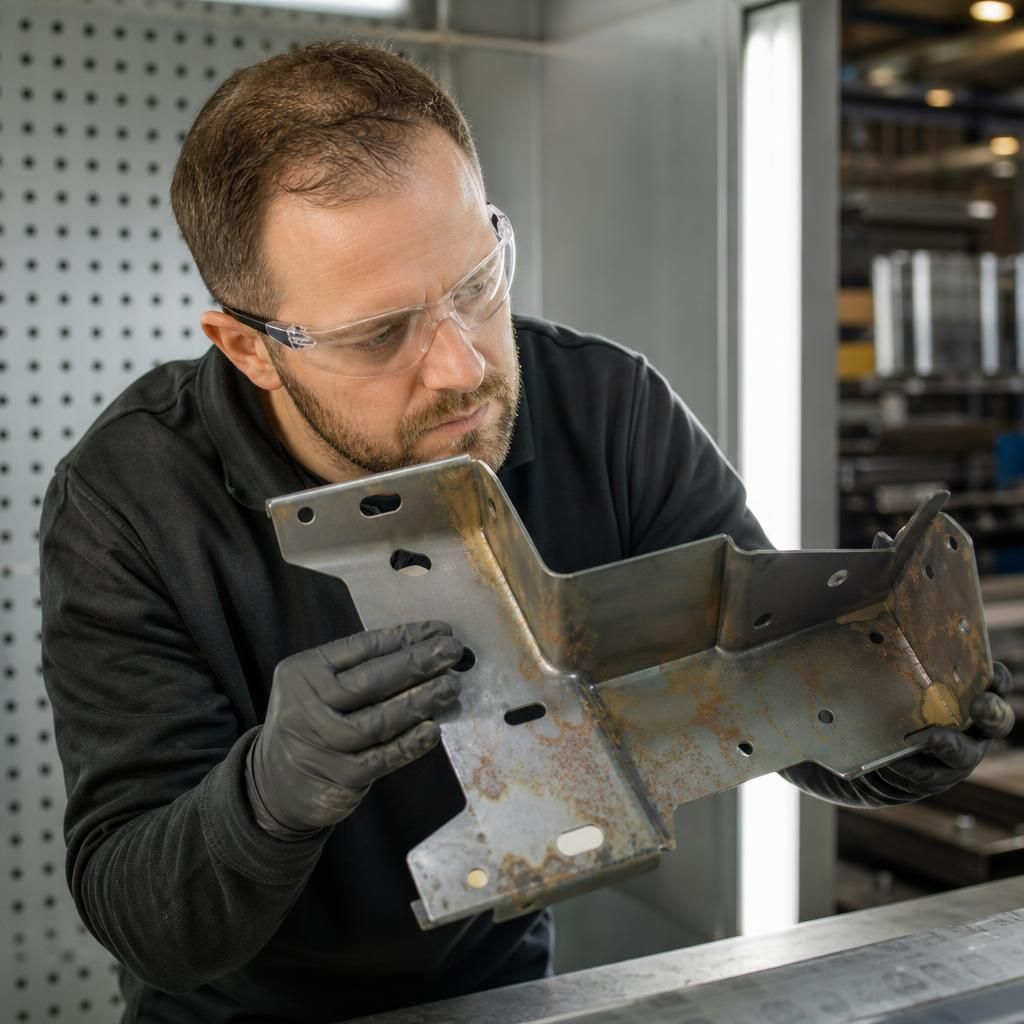
Post-degreasing inspection should also identify early oxidation, not just oil or chemical residue. Clean steel that remains damp can develop flash rust, visible as brown, orange or bluish discolouration. Aluminium and other reactive metals may show uneven oxidation or staining. These conditions can affect the suitability of the surface for powder coating even when no grease is visible.
Inspect freshly cleaned metal for consistent appearance across exposed and sheltered areas, particularly around welds, edges and moisture-trapping features. If oxidation or staining is present, do not treat the surface as ready for coating. Follow the approved preparation route for that metal and coating system, then repeat the relevant inspection before the component proceeds to powder application.
Discuss Your Post-Degreasing Inspection Requirements
Discuss your post-degreasing inspection requirements with the powder-coating team before sending components for treatment. Sharing the metal type, component design and required acceptance criteria helps establish a suitable preparation and inspection approach.